
Conductive Level Switch: How It Works, Relay Wiring and Setpoints
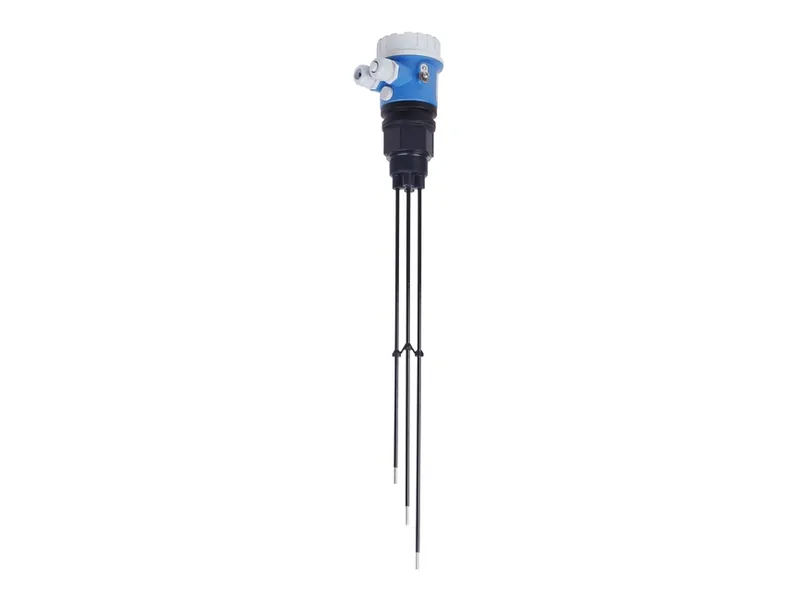
A conductive level switch works because the liquid itself closes a circuit. When the surface touches an electrode, a small current flows between that electrode and a common reference, and an electrode level relay switches a pump, valve or alarm. It is a good fit for tap water, make-up water and most dilute acids, caustics and salt solutions. It does not work in pure water, deionized water or oils. This conductive level switch guide is for electricians and maintenance teams who wire and set up tank level control on dosing skids, day tanks and sumps.
How a conductive level switch works
A typical conductive level switch system has two parts: probes in the tank (rods or ropes) and an electrode level relay in the control panel. Most pump-control setups use three probes:
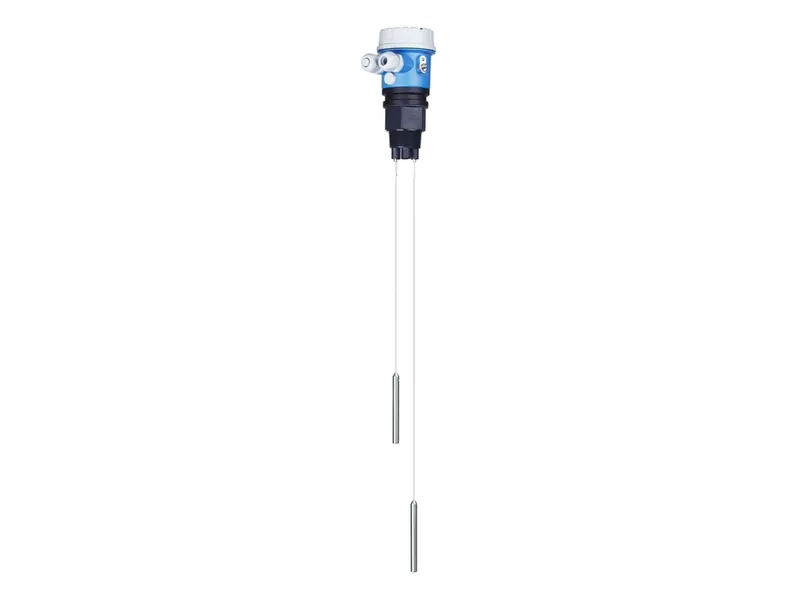
Figure 1: Endress+Hauser Liquipoint FTW32 rope probe. Image source: Endress+Hauser official website
- Common (reference) probe: the longest one, always submerged. On a well-grounded metal tank, the tank wall can serve as the common.
- Low-level probe: cut to the low setpoint.
- High-level probe: the shortest, cut to the high setpoint.
The relay applies a low AC voltage between the common and the other probes. AC is used rather than DC because it reduces electrolysis and polarization on the probe surface, which would corrode the tips.
Why a conductive level switch uses three probes
A single probe can raise an alarm, but if it controls a pump, ripples at the surface make the pump chatter on and off. With three probes, the relay latches, creating a deadband between the two setpoints. In fill mode:
- Level drops below the low probe, the relay energizes and the fill pump starts.
- Level rises past the low probe; the relay holds and the pump keeps running.
- Level reaches the high probe; the relay drops out and the pump stops.
- Level falls past the high probe; the pump stays off until the low probe is uncovered again.
Empty (drain) mode is the reverse. Most relays select the mode with a jumper or DIP switch, so check it before commissioning.
Electrode level relay wiring
Terminal labels vary by manufacturer. A common scheme is E1 for high, E2 for low and E3 for common, plus supply terminals and an output contact. Always follow the wiring diagram in the manual.
- Connect the supply to match the relay's rated voltage. AC and DC versions are not interchangeable.
- Land each probe wire on its terminal. If the tank is the common, run a bonding wire from the tank to E3.
- Wire the output contact into the pump contactor coil circuit or a PLC input. Relay contacts are small and should never carry motor current directly.
- Use shielded cable for probe wiring and route it away from power cables.
Isolate and lock out power before any wiring work, and verify it is dead. Long probe cables add capacitance between conductors, and the relay can read that as liquid present. Keep cable runs within the manufacturer's limit.
Integrated conductive level switch or panel relay?
An integrated conductive level switch carries its electronics on the probe head and outputs a PNP or relay signal. The Endress+Hauser Liquipoint FTW31 (rod) and FTW32 (rope) are examples; the manufacturer lists a minimum medium conductivity of 10 µS/cm and up to five switch points on one probe. A separate probe plus panel relay is easier to service and re-set. For tanks far from the panel, or in hazardous areas, check the approvals of the integrated version.
Setting high and low setpoints
There is no keypad on a conductive level switch; you set it by cutting probe length.
- Low setpoint: keep it above the pump suction with enough margin that the suction line never pulls air. On a dosing pump's solution tank, a low point set too low means refilling starts while the pump is already close to running dry.
- High setpoint: keep it below the overflow, allowing for the water that still drains from the fill line after the valve closes.
- Spacing: too close and the fill pump cycles constantly; too far apart and batch concentration swings. Size it to tank volume and chemical usage.
Rope probes need weights and should hang clear of the wall. If the tank has a mixer, keep probes away from the impeller or use a stilling tube, or the surface turbulence will make the relay chatter.
Sensitivity and medium conductivity
Whether a conductive level switch works at all depends on the liquid. An adjustable-sensitivity relay is really setting the resistance threshold it treats as wet.
Pure water, DI water, RO permeate, solvents and oils are not suitable. Their conductivity is too low, so the relay may see a covered probe as dry. Use a vibrating fork, float or capacitance switch there.
Sensitivity has two failure modes. Set a conductive level switch too high and condensation, foam or a film of liquid on the insulator conducts, so the pump will not start even though the tank is low. Set it too low and a weakly conductive chemical is never detected, so the tank overflows. Commission with the real liquid.
Conductive level switch fouling and false trips
After months in service, most faults trace back to the probes. Hard water and lime slurry coat the tips with insulating scale, so the conductive level switch misses a rising level. Viscous liquids such as polymer solution bridge between probe and wall, holding the relay in the wet state after the level drops. Rope probes that swing can touch and short. A probe material that does not suit the chemical pits and raises contact resistance.
To troubleshoot, isolate power, pull the probes and inspect them, then meter for continuity that should not be there. For choosing level instruments for the whole tank, see chemical tank level sensor selection.
Where it fits on a dosing system
On dosing skids a conductive level switch usually handles two jobs: automatic water fill for the solution tank, and low-level pump shutdown. It is excellent at the first. For dry-run protection, low-conductivity or crystallizing chemicals make it less dependable. What dry running does to a diaphragm and check valves is covered in can a metering pump run dry, and how fill, mixing and pumps are interlocked is explained in how an automatic chemical dosing system works.
Conclusion
A conductive level switch uses the liquid to close the circuit between a common probe and high and low probes, and the electrode level relay latches between them to start and stop a pump with no moving parts in the tank. Get three things right: wire common, high and low correctly with power isolated; cut probes based on suction, overflow and acceptable cycling; and confirm the liquid conducts, ruling out pure water and oils. Browse level switches or the Endress+Hauser Liquipoint FTW31. Send us the liquid, tank height and control logic, and contact our engineers to confirm the setup.
FAQ
Can a conductive level switch be used on a pure water tank?
Not recommended. Pure and DI water conduct too poorly, so the relay may never switch. A float, vibrating fork or capacitance switch is the safer choice.
Can a conductive level switch control a pump with two probes?
You can get a single-point alarm, but pump control will short-cycle. Automatic fill or drain needs a common plus separate high and low probes, or the metal tank as the common.
Can the relay contact switch the pump motor directly?
Usually not. Use the contact to drive a contactor coil or PLC input, and let the contactor carry the motor load.
How often should conductive level probes be cleaned?
It depends on the liquid. Clean water fill can wait for routine service, while lime, polymer and hard water duties need shorter intervals. Any false trip is a reason to inspect.
The tank is full but the pump will not stop. What should I check first?
Check the high probe for scale or coating, then the probe wiring and terminals, and finally the sensitivity setting and the relay itself.