
NEWDOSE Metering Pump Installation: Step-by-Step Site Guide
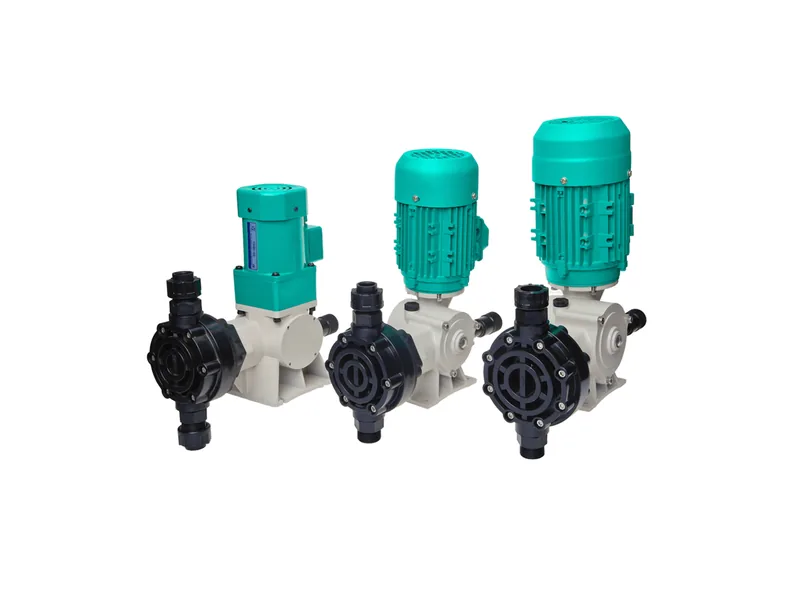
A NEWDOSE metering pump installation is not complicated, but doing the steps in the wrong order turns commissioning into a long afternoon. The sequence we recommend is simple: fix the pump location, run the suction line, then the discharge line and its valves, and only then wire the pump, bleed it and start it. The same logic applies to the DFD, DP and DM solenoid pumps and to the NDJ and ND2000 mechanical diaphragm pumps; the details differ, and we point those out below. Wiring diagrams are covered elsewhere.
Step 1: Choose the Location for a NEWDOSE Metering Pump Installation
Keep the ambient temperature between -10 and 45 ℃, choose a dry, ventilated and reasonably clean spot, and keep the pump and tubing out of direct sunlight. Outdoors, add a rain cover.
Mechanical pumps go on a raised platform so there is room to connect piping under the inlet valve. Solenoid pumps are small enough for a wall bracket, but they still need to be away from heat sources.
Then look at the height of the pump relative to the tank. The best layout puts the pump below the minimum liquid level, so the chemical floods the pump head on its own. If the pump has to sit above the liquid, keep that height difference as small as you can. This one decision affects every later step of a NEWDOSE metering pump installation.
Step 2: Suction Line and Foot Valve
Most "pump runs but does not dose" calls trace back to the suction side: an air leak or too much lift. Check these points one by one:
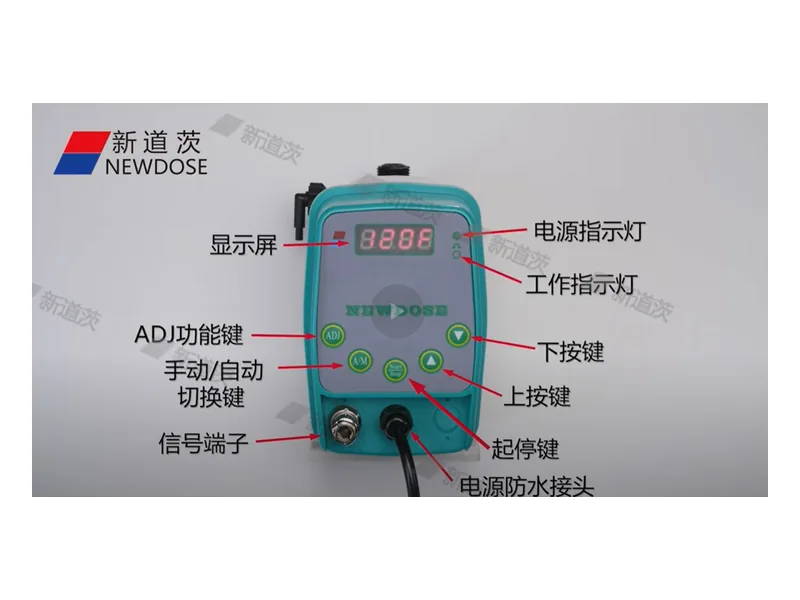
Figure 1: NEWDOSE DM series solenoid metering pump control panel. Image source: NEWDOSE official website
- Suction pipe bore no smaller than the pump inlet; go larger for viscous chemicals.
- Short, straight runs with smooth bore pipe and long-radius bends.
- No high loops. A bend at the top of the suction line traps gas, and the bubble grows until the pump loses prime.
- A strainer or foot valve on the suction end, cleaned on a schedule.
- For mechanical models, a maximum suction lift of about 2 m water column. Beyond that, switch to flooded suction.
Solenoid pumps usually ship with 2 m of PVC suction hose and a foot valve with strainer. Hang the foot valve a little above the tank floor so it does not pick up sludge. Brush soapy water over each joint; bubbles mean an air leak, and that test is the cheapest step in a NEWDOSE metering pump installation.
Step 3: Discharge Side of a NEWDOSE Metering Pump Installation
The discharge pipe must be rated for the maximum system pressure and supported on its own brackets. Never let the pump head carry the weight of the pipe. On solenoid models the standard kit includes 1.5 m of PE discharge tubing and an injection valve with a 1/2" G thread that can be taped and screwed straight into the dosing point. If the site insists on rigid PVC, an optional hard-pipe adapter takes DN15 PVC directly.
When does a NEWDOSE metering pump installation need a back pressure valve? The guidance is that if the pressure difference between pump suction and discharge is below 1 bar, you should add one to create artificial back pressure. Without it, accuracy drifts and the line can siphon. The same applies when the injection point sits lower than the tank liquid level.
Place the back pressure valve close to the pump outlet in most cases. With a high flow rate and a long, narrow discharge line, move it close to the injection point instead. If a pulsation dampener is fitted, the back pressure valve goes after the dampener so it works in a steadier, half-open position and wears more slowly.
Step 4: Relief, Isolation and Vent Valves
On mechanical pumps, put a relief valve on the discharge line between the pump and the first isolation valve. If someone closes a downstream valve by mistake, pressure cannot keep climbing until it cracks the head or bursts a fitting. Route the relief outlet back to the tank or to drain, with a visible end so a passing relief valve is noticed.
Fit isolation valves on both suction and discharge, with the discharge isolation valve downstream of the relief valve. A tee and valve near the pump inlet and outlet lets you flush the head without breaking the piping. A vent valve at the outlet makes the first start-up much easier. Whatever the model, no NEWDOSE metering pump installation should ever run against a closed discharge valve.
Step 5: Power Connection
Isolate and tag the supply before wiring any NEWDOSE metering pump installation. Solenoid pumps need a circuit breaker between pump and supply and a sound earth. For three-phase mechanical pumps, jog the motor first and check rotation: the fan should turn clockwise, matching the arrow on the motor. If it runs backward, swap any two phases.
Step 6: First Priming and Start-Up After NEWDOSE Metering Pump Installation
Check every bolt and joint again and confirm all discharge valves are open before the first start of the NEWDOSE metering pump installation.
Solenoid pumps: start the pump and open the bleed valve about half a turn. Liquid reaches the head quickly; close the bleed valve as soon as chemical comes out of the vent tube, which should run back to the tank. Without a bleed valve, disconnect the discharge tube at the injection valve, let chemical fill it, then reconnect.
Mechanical pumps: open the suction and discharge valves so the suction line and head fill first. Start the pump with the capacity knob at roughly 30 % to purge air, then adjust the back pressure valve slowly as the gauge approaches the target pressure. Never exceed the rated pressure. Increase the stroke gradually to the required flow.
The nameplate flow on NEWDOSE pumps is measured with clean water at ambient temperature. Real chemicals and real piping change the output, so finish every NEWDOSE metering pump installation with a calibration column check.
Conclusion
Summed up, a good NEWDOSE metering pump installation follows this order: fix the location, build a leak-free suction line without air traps, give the discharge both back pressure and relief protection, confirm motor rotation, then bleed and bring the pump up slowly. For accessory order along the line, see our metering pump installation diagram guide; for bases and electrics on larger pumps, see the mechanical diaphragm pump installation plan. If the pump still will not dose, work through the NEWDOSE pump not pumping checklist. Browse the NEWDOSE brand page or our mechanical diaphragm metering pumps, or send us the chemical, flow, pressure and site layout and contact our engineers to review your NEWDOSE metering pump installation plan.
FAQ
Can the pump be mounted above the chemical tank?
Yes, but it is not the first choice. Keep the lift short, and for mechanical models stay within about 2 m water column. Gassing or viscous chemicals are better handled with flooded suction.
Do I need both a back pressure valve and a relief valve?
Usually yes, in a NEWDOSE metering pump installation on a mechanical model. The back pressure valve protects accuracy and stops siphoning; the relief valve protects against overpressure. NEWDOSE mechanical pumps can take a multifunction check valve whose spring element can be set for back pressure or relief duty, but the setup depends on line pressure.
Should the suction line be hose or rigid pipe?
For small solenoid pumps the supplied PVC hose is fine as long as it is not kinked. Mechanical pumps with longer runs are better on smooth rigid pipe with few bends.
Why start with a low stroke setting?
Air purges more easily at low flow, and pressure rises gradually, so leaks show up and the back pressure valve is easier to set. Starting at full stroke with air still in the line gives unstable output.
How often should a NEWDOSE metering pump installation be checked?
Look at every joint and the pressure gauge daily for the first few days. After that, clean the foot valve and check valves on a schedule that suits the chemical; crystallizing or aggressive chemicals need shorter intervals.